

These instructions assume you have a supervised version of Home Assistant (HA) installed. Specifically, this is from the standpoint of using Home Assistant OS running on a Raspberry pi 4 with 1GB ram, other systems may differ and more ram is suggested. The guide is long, detailed, but without fluff.
Also, remember that if your esp board does not have a built-in usb port you will need a UART adapter to flash your board for the first time.
Installing ESPHome
- Inside of Home Assistant go to: Settings > Add-ons, and click on the blue button on the lower right that says: Add-on Store

- Search for ‘ESPHome’ and it should filter the list and show you (at time of writing) three options: ESPHome, ESPHome (beta), ESPHome (dev). Choose ‘ESPHome’

- Turn on any options you wish. Starting out, probably the ‘Start on Boot’, ‘Watchdog’, and ‘Show in Sidebar’, options.
Adding a Placeholder ESP device
- Click on the ‘Open Web UI’ link on the lower part of the main dashboard pane.
- Click the ‘New Device’ button on the next page.

- You will probably see this screen:
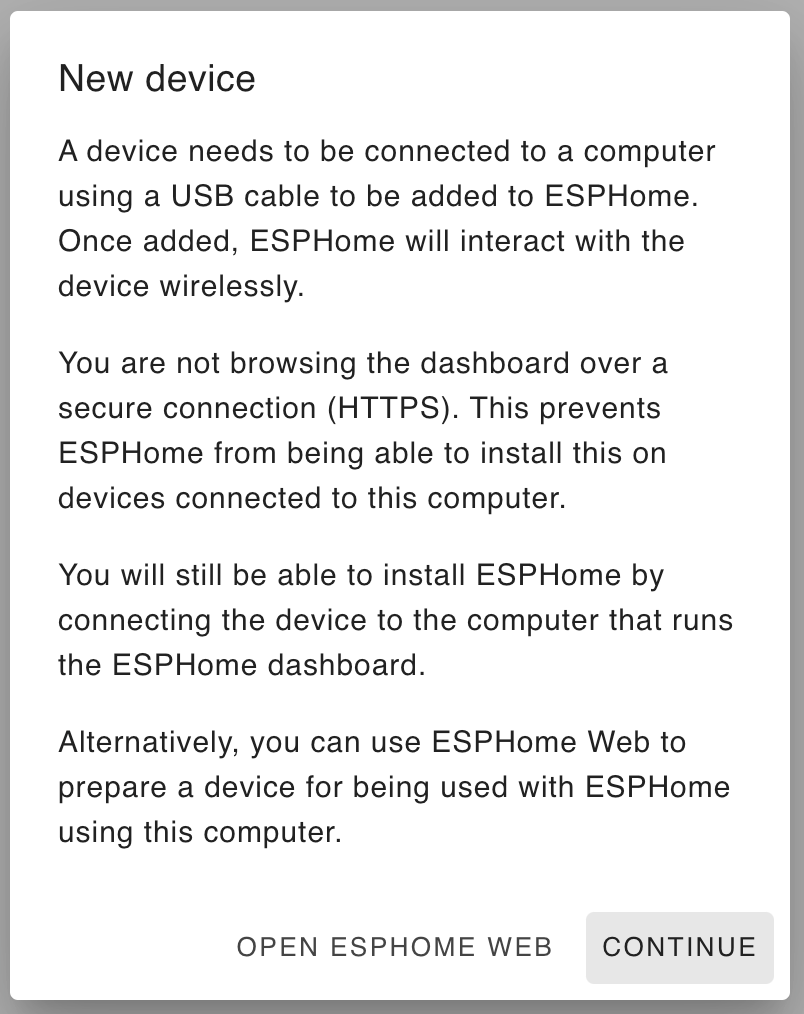
- Click on ‘Continue’
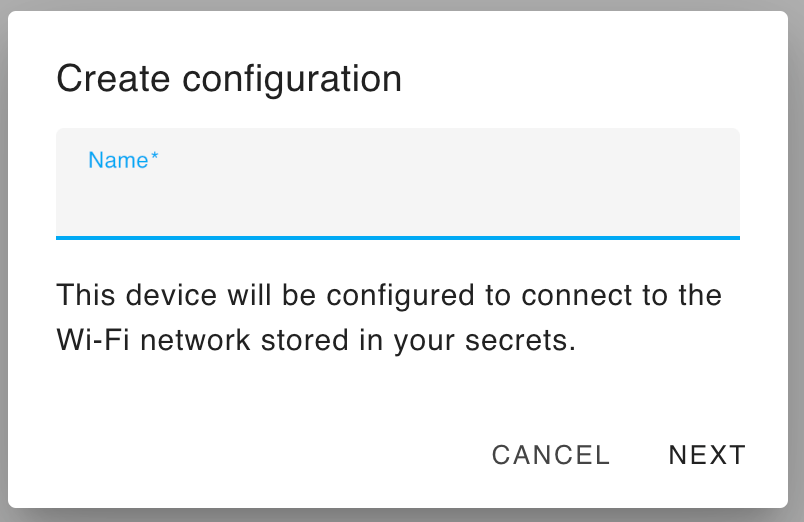
- Name the device according to your preference and click ‘NEXT’. Anything that distinguishes the device and is recognizable. NOTE that this popup will contain fields for inputting your WIFI name and password the first time you setup a device. This information will be saved and applied to all future installations in a ‘Secrets’ file and may be accessed via a link at the upper right.
- Select your ESP board type in the popup window that opens.

- This will bring up the following dialog explaining that your configuration has been created.
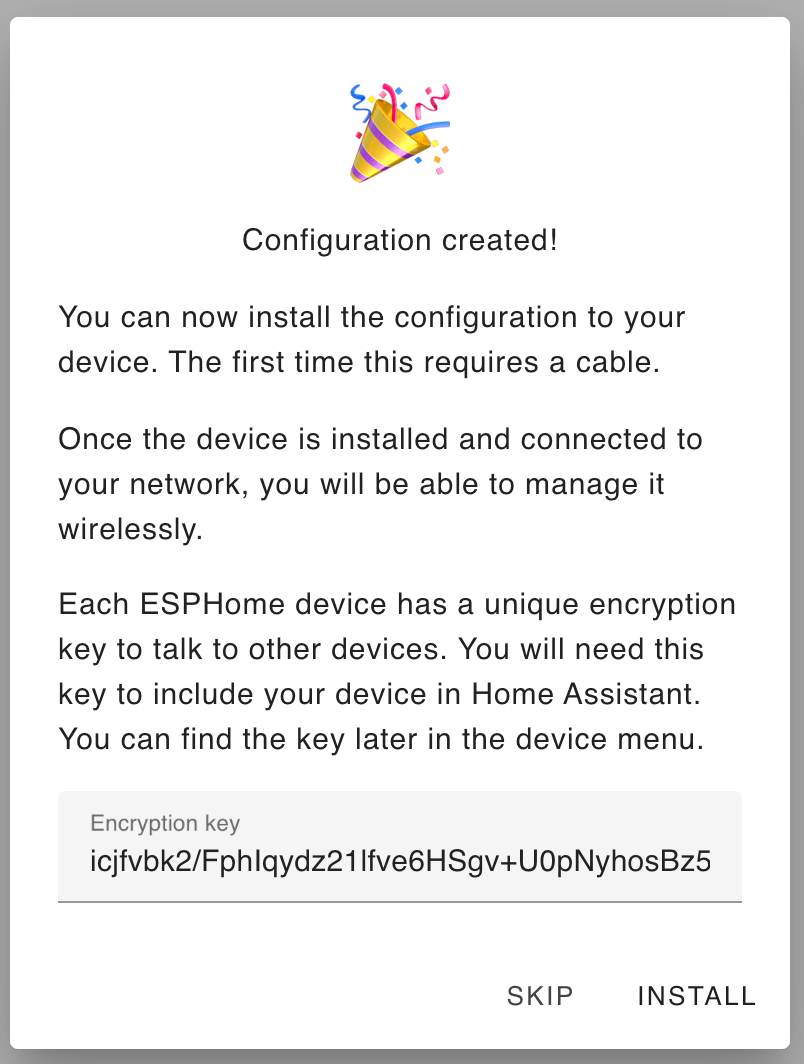
- Click on the encryption key to copy it to your clipboard and paste it somewhere safe.
Preparing Board for First Use Via ESPHome.io
This seems to only work if the board is directly hooked up to the computer running the browser. It is sometimes needed if there is a problem with the install. This seems to do a better job wiping old information off the board, whereas HA seems like it may get hung up on old ghost files.
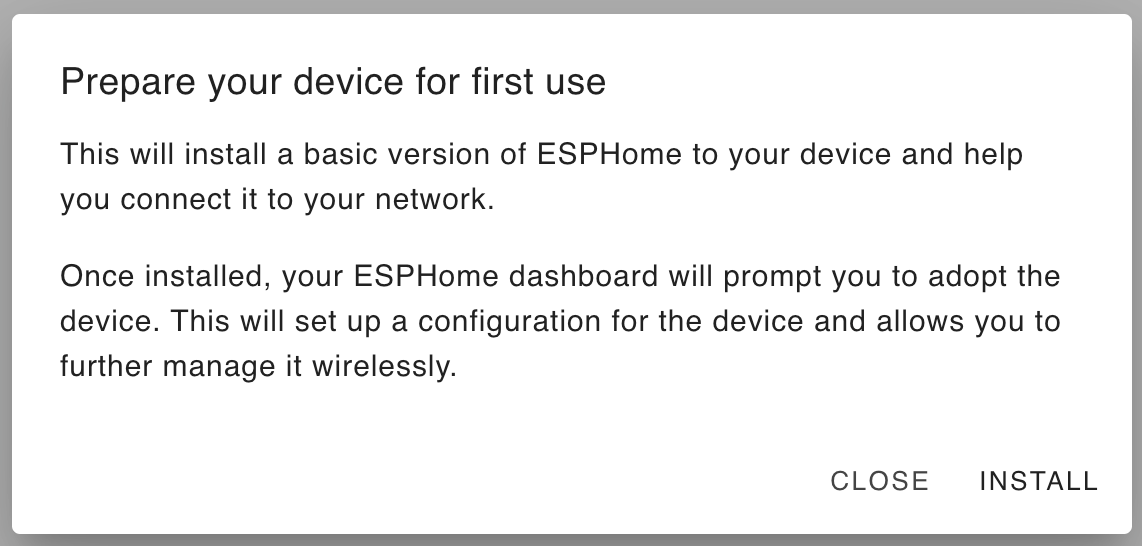
- Go to this link: https://web.esphome.io/ and click ‘PREPARE FOR FIRST USE’
- This will bring up this popup where you should click ‘INSTALL’
- After you finish following instructions you should be able to configure your WIFI.
- Click to visit your device which will open up the ESP boards new ESPHome internal webpage.
- Keep this tab open and visit HA, where you will hopefully find a card asking you to ‘ADOPT’ it.
Installing the new configuration to your ESP board
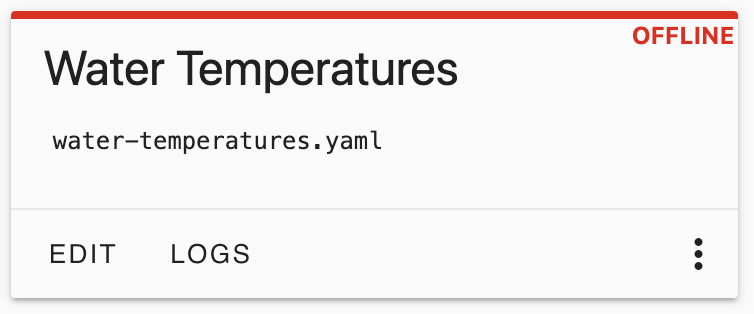
- You will see a new device named according to what you named it earlier.
- Click on the ‘EDIT’ button. This is where you will be able to put in the code for this configuration so it will actually do something. At the end of the file (after ‘captive_portal:’) is the only spot you really need to worry about at first, this is where you may place your devices specific information for each attached entity, such as sensors, buttons, etc.
- You will need to find examples elsewhere on how to edit this configuration file to suit your specific needs, but here is an example on how to configure it to use a 18D20 temperature sensor.
NOTE that YAML is exceedingly picky about formatting.
Spacing is paramount. Indents are mandatory and must be 2 spaces per indent, and no tabs are allowed. Capitalization is also important. - After you are done editing your YAML file, click ‘SAVE’, then ‘INSTALL’.
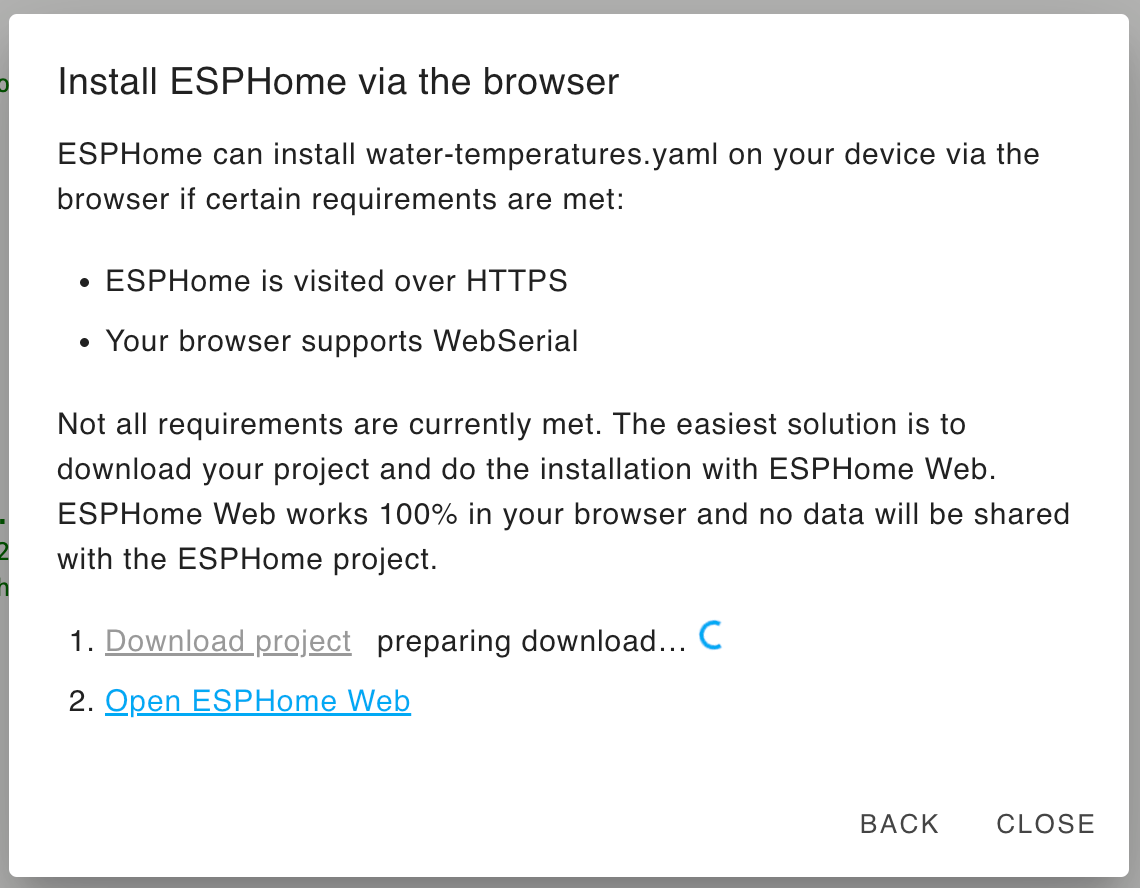
Note that editing is optional for installation, the file’s existing boilerplate is enough for HA to recognize the device. Initially, a USB cable is required to configure a new device, but subsequent changes can be made via WIFI. - Plug your ESP board into the computer that is displaying this instance of HA (ie. if you are using a browser on your laptop, plug your ESP board into a USB port on the laptop). Select the ‘Plug into this computer’ option. It as also sometimes advised to not have any wiring hooked up to your ESP board at this stage. If you run into problems try unhooking the board from the wiring and try again.
NOTE that not all USB cables are created equal. Use a cable you know to be capable of supporting data transfers. There is no way that I know of to tell the difference by looking, you just need to try it… - Wait for the firmware to compile and then click the ‘Download project’ link.
Note that if it fails you may be running out of ram as one of the many possibilities. If so, you can stop all other running add-ons within HA and it may then work. Alternatively, you may go to ESPHome > Configuration and turn on the ‘Show unused optional configuration option’. This will allow you to set the ‘Default compile process limit’ to 1. Then save, reboot and try again. It will also sometimes work if it failed the first time just by clicking the ‘what went wrong’ link which will instead of bringing up a log of the install like you might expect, will instead bring up a window that tries to install it again, except while logging it this time…
- If it was successful you can then click ‘CONNECT’ on the configuration, and then choose the USB bus that your ESP board is connected to. If you do not see a USB bus listed, you may not have the appropriate drivers installed and you’ll then need to go searching online for the answer to why you always do this to yourself…
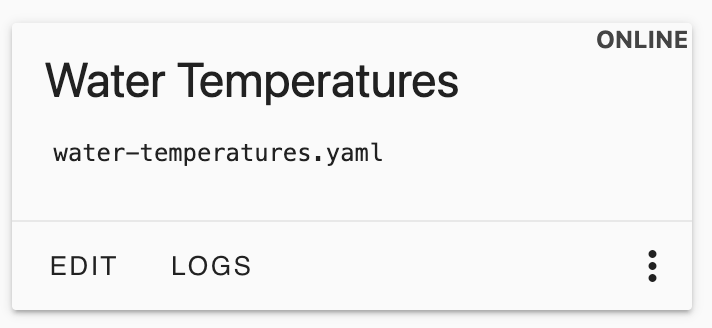
- You should now be able to press ‘INSTALL’ and after it is finished (2-3 minutes) you should have a device that now says ‘online’
- This can alternately be done via https://web.esphome.io/ which may be preferable sometimes as it seems to do a better erase than the ESPHome inside of Home Assistant.
Connecting the the new device to Home Assistant
- You should now be able to go to System > Devices and Services > Integrations, and if your lucky your device will be automatically found and show up, asking you to configure it. If your unlucky go to the next step…
- First try restarting HA. If that doesn’t get the integration to show up then…
- Press the ‘Add Integration’ button in the lower right and then search for and select ESPHome.
- Enter the ip address for the device. You can go to your router and look for a likely ip and try it. You can leave the port as is. Then click ‘SUBMIT’
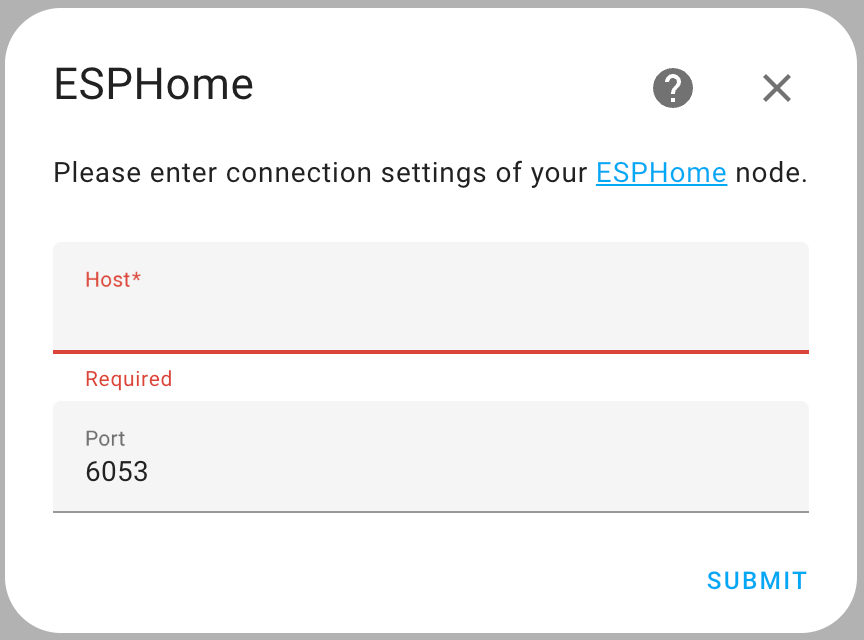
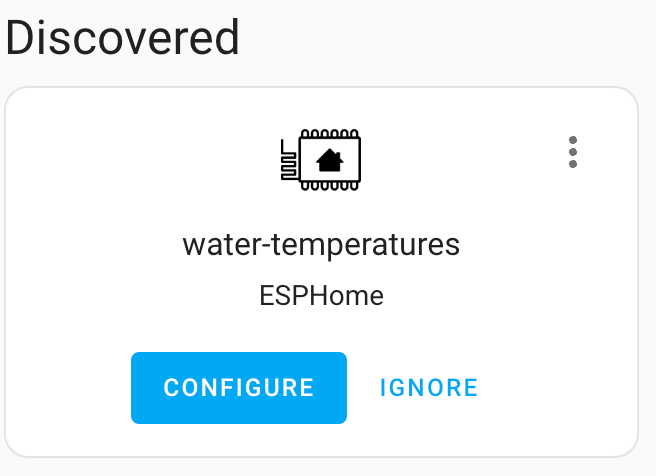
- You should hopefully be looking at the following card now. Press ‘CONFIGURE’
- Finally! It should be done! You should be proud of yourself that you were able to persevere, and ashamed at yourself for how much time you just used so you can have those rgb lights…
At this point you should feel confident that you can do this again next time, but then realize that the only reason that this post exists is because the author kept forgetting how to do it, and you might to. Better bookmark it just in case…
Sample device YAML file for an ESP8266 and a DS18D20
esphome:
  name: water-temperatures
  friendly_name: Water Temperatures

esp8266:
  board: esp01_1m

# Enable logging
logger:

# Enable Home Assistant API
api:
  encryption:
    key: "icjfvbk2/FphIqydz21lfve6HSgv+U0pNyhosBz5cJ4="

ota:
  password: "bd7edd972e72ba3329d569f68b60b66b"

wifi:
  ssid: !secret wifi_ssid
  password: !secret wifi_password

  # Enable fallback hotspot (captive portal) in case wifi connection fails
  ap:
    ssid: "Water-Temperatures"
    password: "48iuNt2FriYr"

captive_portal:

# Configuration entry
dallas:
  - pin: GPIO04

# Individual Entities
# 'platform' is where the sensor type goes. This must be looked up.
# 'address' is where the sensor id goes in the form of 0xab00000262608928
# 'name' must be unique to this device, and is used to reference that specific entity.
sensor:
  - platform: dallas
    address: 0xab00000262608928
    name: "Tank Temperature"
In this particular example, the address and name may be left off for now and when the program runs it will automatically find any sensors connected. You may find the actual addresses of all of the entities it has found if you click on the ‘LOGS’ button of the device configuration. Simply copy/paste the values into this YAML and redeploy it to your ESP device.